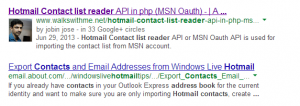
Google Authorship Markup How to get your picture in search result
Google Authorship Markup or how to get your picture in search result is a valuable topic ? Yes definitely Search Engine Optimization needs better social support too. These days Google is adding new ideas to the Search Engine Algorithm its very important and most useful for blog authors and many other website users.
We can just check what is the important of linking your picture in search result. In your website you added a page that has good SEO key words, meta details and good urls etc totally the page will perform very well in the Google search. Why don’t you think your competitor also did the same thing, then how to promote your web pages or getting better ranking in search result. The Google Authorship markup or get your picture in search result option is more valuable here.It will increase your website traffic 100% its a well known fact for everyone.
Google provides two methods for adding your picture in search result
- Email verification
- Authorship by Simple Linking.
Here I’m explaining the picture integration for single author website.only few steps and much easier .
Step 1:The first requirement is a Google plus account if you don’t have please create it.
It must have profile picture with your head shot both eyes visible.
A valid First name and Last name.
Step 2:You should have an email with your domain name like “jobinjose01@walkswithme.net” ie, ends like @walkswithme.net (your domain name).
Step 3:Integrate Google Authorship Markup to your website. First login to your Google plus account. Then create a link like below with your unique Google+ account number.
<link href="https://plus.google.com/115513814000419270437?rel=author" rel="author" />
//Should replace with your unique number
The above code should be added inside your header section ie, inside head tag.Then you have to verify it Google Authorship Markup with email , the email ends with your domain name for sending verification email check here.
Then you just need to verify it from your email id. This will add your email id inside your profile page work section and add your website link in contributor section, after that you can set it visibility in Google+ profile for others. check here.
Step 4:The final step for Google Authorship Markup or get your picture in search result is you have to set the following byline codes in your pages, should be every page.
<span class="author">jobin jose</span>
<span class="entry-date" >2013-08-17 12:00:00</span>
<span class="entry-title">your page title</span>
And finally a links like follow
<a rel="author" href="https://plus.google.com/115513814000419270437">jobin jose</a>
The Google Authorship Markup done. How to check this ? click here.
Possible errors :
- If you miss any byline codes it will report in the Rich snippet code like “entry-title not found” etc.
Another possible error situation is
- Email verification has not established authorship for this webpage. (This will appear after you confirm the email then leave it Google will take time to index your pages 3-4 days).
- Automatically detected author name on webpage: Not Found. (If you place the author byline code exactly like above that name should match with your Google+ profile then only its works . Both are same then again this error don’t worry it will works in Google search.)
